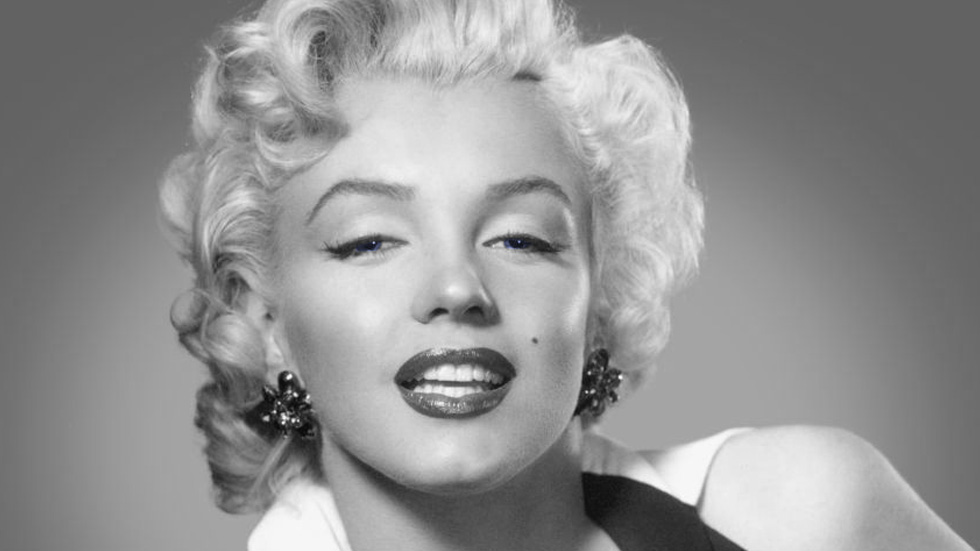
Contrary to popular belief, Kim Kardashian is not the pioneer of contouring. In fact, it’s none other than Marilyn Monroe, who used the technique for her famed red pout.
To make her lips appear fuller, Monroe would apply several shades of lip color and gloss to create dimension. Because I, along with the rest of the Internet, am fascinated by pop culture’s current fixation on voluptuous lips, I figured it was the perfect time to have a go at the technique.
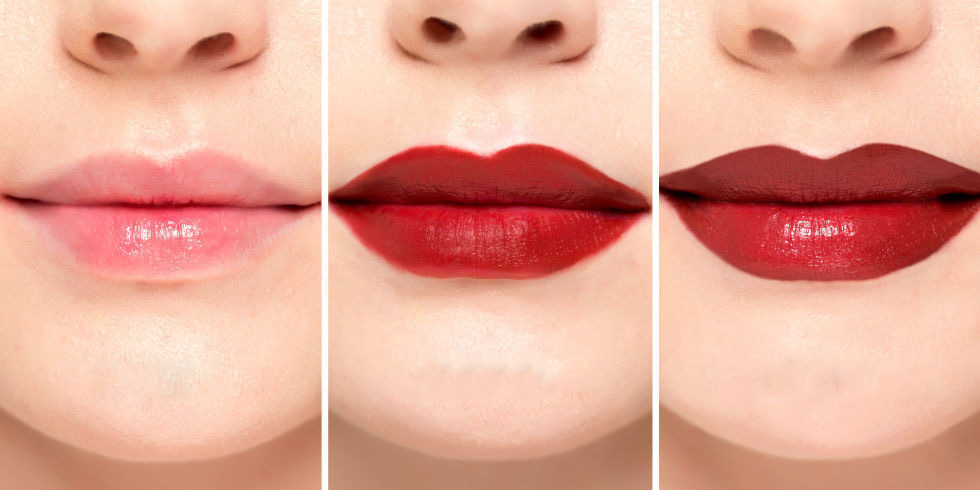
I looked to Laramie Glen, makeup artist, to break down Monroe’s admittedly complicated technique. And to show just how dynamic the results of lip contouring can be, Glen initially gave me a classic matte red lip (in the middle above), which is usually what I go for. Then for Monroe’s method, she applied darker reds on the outer corners and lighter hues brushed on the middle of my lips.
Here’s how it looks on our matron saint of beauty:
At first, I had to get used to the bolder impact of the color and shine, as well as the extra layers of product. But what my 3-D lippy lacked in kiss-ability, it made up for in sheer size and definition — especially in a picture. (all selfie enthusiasts will love it.) I also appreciated that while a matte formula tends to make my lips feel like they’re showing all their flaws, the layers of color in Marilyn’s look counteracted any dryness or flakes.
All in all, while I can totally get behind its camera-ready effect and the wonders it worked for Monroe on-screen, I wouldn’t recommend lip contouring for every day — just special occasions where you’ve got time (and plenty of it) to spare. To recreate it yourself, follow Glen’s steps below:
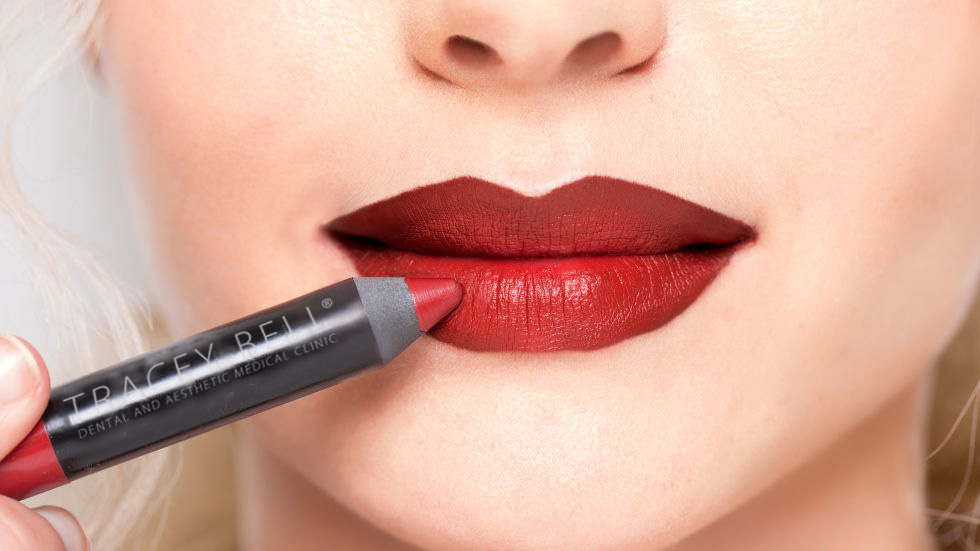
Step 1: Line the Lips
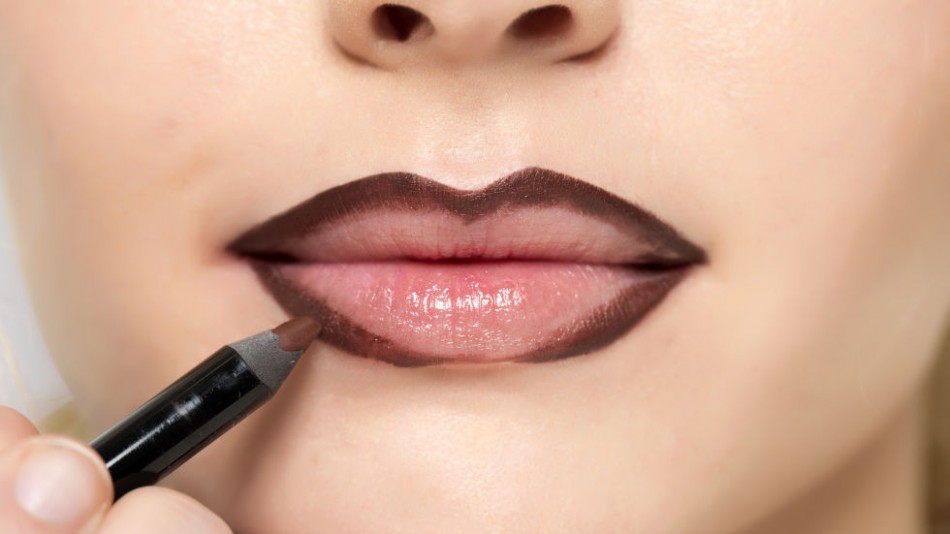 After exfoliating your lips, create the shape of the lips you want with the darkest color pencil. I like to use a deep chocolate to give the illusion of depth.
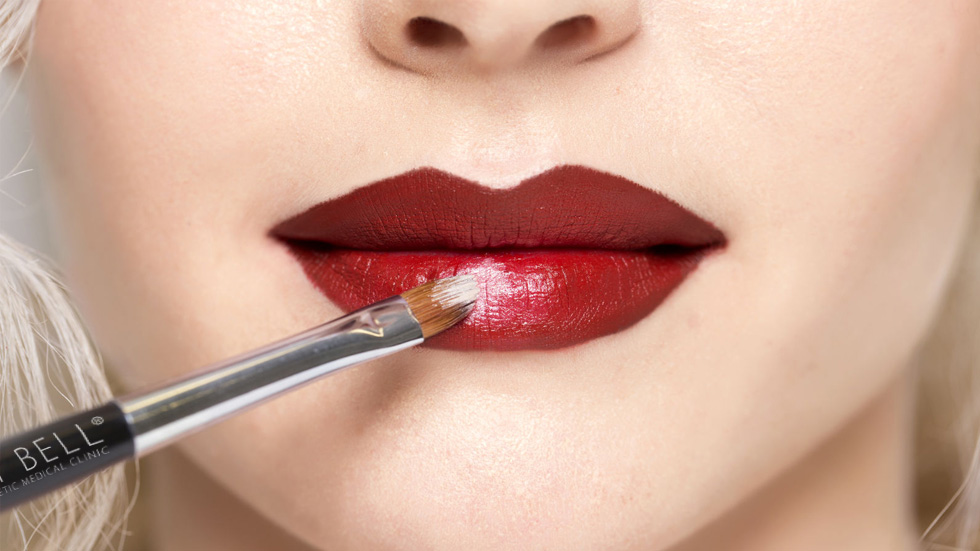
Step 2: Create a Base
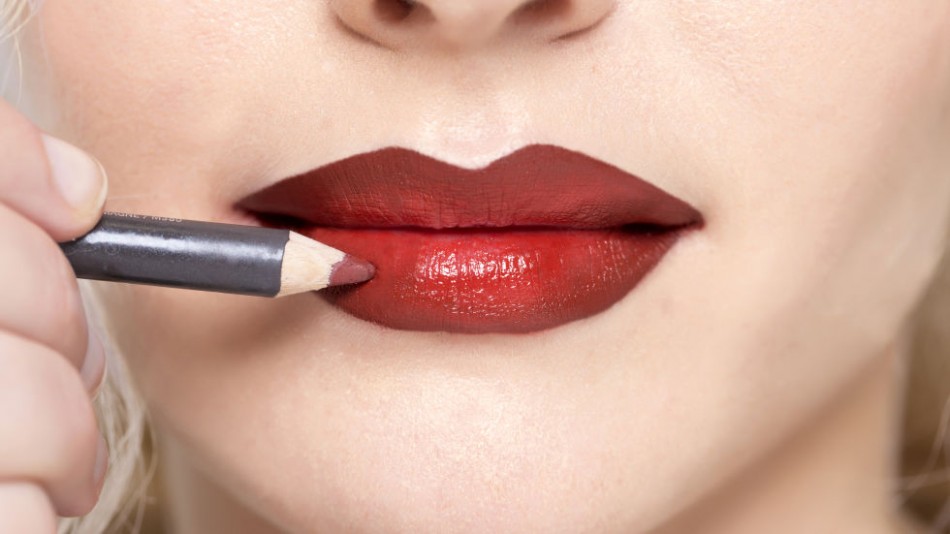 Use a brick red and fill in the lips with the pencil. Focus on the corners of the mouth and use small, short strokes from outline to the center of the lips.
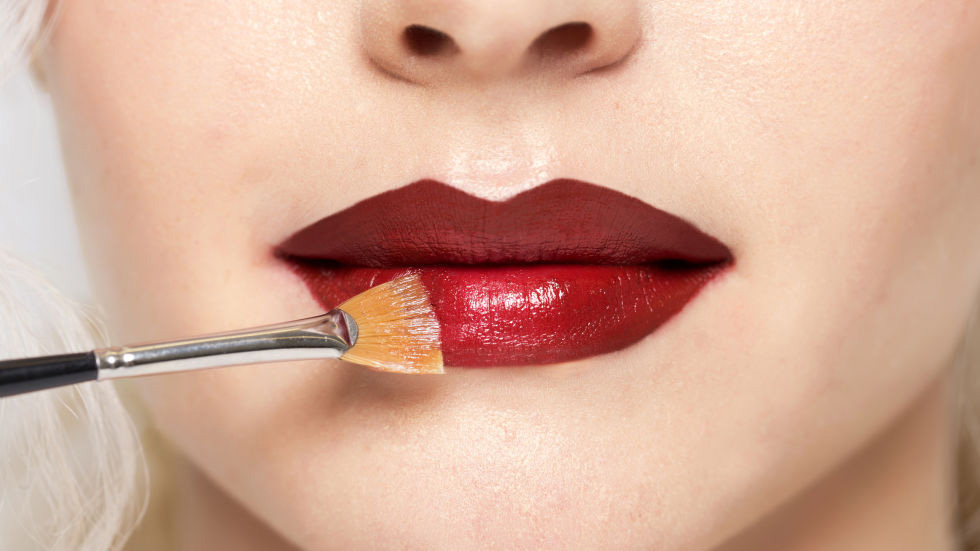
Step 3: Blend the Color
 With your brightest red, start in the center of the mouth and use short, blending strokes. Be careful not to go too close to the outline of lips (you don’t want to erase the depth you created), but use this step to make sure everything is blended.
Step 4: Highlight
 Using a brush or your fingertip, press a cream highlighter into the center of your bottom lip. This adds fullness and draws the eye to the center of your mouth, making your lips look more lush.
Step 5: Moisturize
 Use a rose lip balm to add moisture and wetness back into your lips. Using a slick balm instead of a lip gloss will keep your lips healthy and hydrated, without going overboard.
The Finished Look
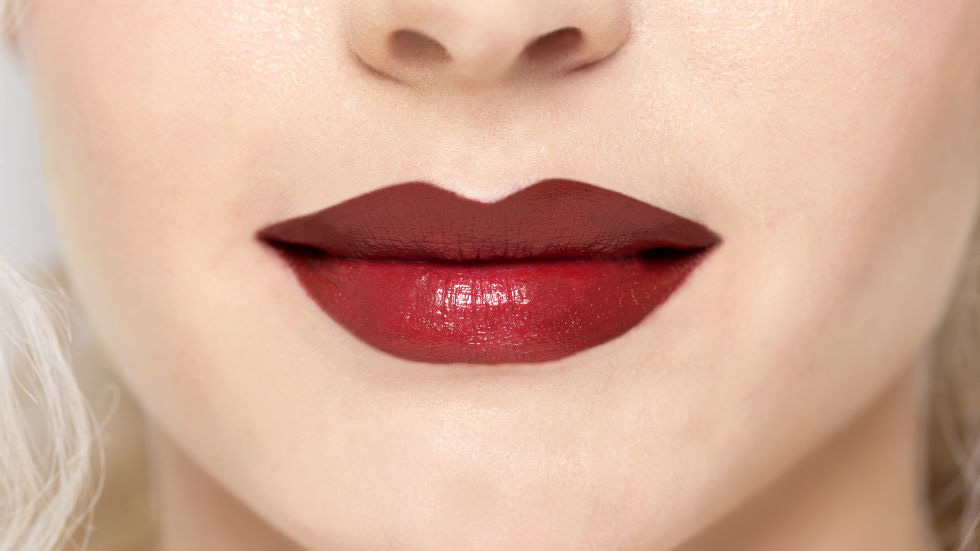 Voilà! You have lips that are fuller, shinier, and decidedly more illuminated.
